These are the steps we're going to take:
- Check the terminology

- Locate the relevant HTML source file

- Copy and paste the ICRA label

- Choose an ICRA button

- Test

- Further support
Check the terminology
-
HTML Source File All pages on the internet, however simple or complicated, are written in a common language known as HTML (Hyper Text Markup Language since you asked!) Some pages may use additional computer languages as well, but even the most complex has HTML at its heart. Right click anywhere in this block of text and select [View Source] to see the HTML source code for this page - then close it again.
Scary? It needn't be - most of it you can ignore!
-
ICRA label This is the piece of HTML code we sent you. It will look something like this:
<META http-equiv="PICS-Label" content='(PICS-1.1 "https://icra.org/ratingsv02.html" l gen true for "http://www.mydomain.com" r (cz 1 lz 1 nz 1 oz 1 vz 1) "http://www.rsac.org/ratingsv01.html" l gen true for "http://www.mydomain.com" r (n 0 s 0 v 0 l 0))'>
In HTML terms, this is known as a Meta Tag. There are several meta tags in a typical web page which carry information such as the language in which the page is written, the title etc.
- Windows Notepad This is the basic "text editor" which comes with every copy of Windows. You can access it from the accessories section of the Start Menu. In effect, it is a very simple word processor. We're going to use this simple program so that we are sure that the software is not going to "make changes all by itself." Notepad isn't clever enough to do that!
Locating your HTML source file
Launch Windows Notepad, click the [File] Menu and select [Open]. This will bring up the window below:
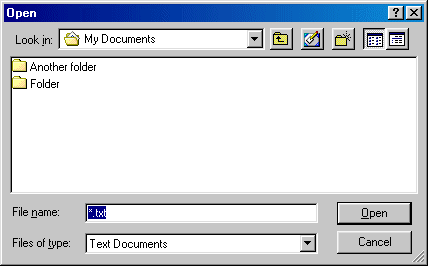
Notepad usually begins by looking in the "My Documents" folder. There you will see the various folders on your system. Navigate your way to the folder which contains the files you've been working on to create your web site. We can't be more specific than that - everyone organizes their folders in different ways.
Like most programs, Notepad's Open dialogue only shows the files which it created - Text Documents - and you may not have any of those. In the image below, Notepad is looking at the folder which contains all the English language files for this site!
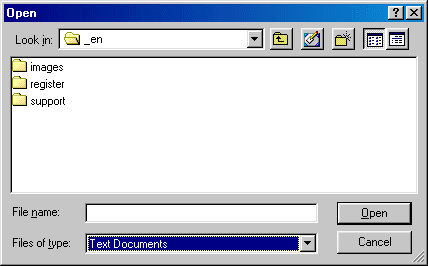
We need it to show all files. To do this, click the arrow to the right of the highlighted box and you'll see the two options - Text Documents and All Files, as shown below:
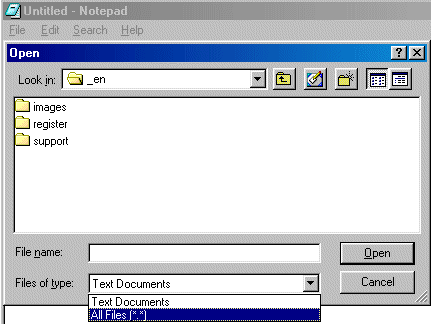
Click "All Files" and you will see - you guessed it - all the files in that folder, including the important HTML files you're after. See below:
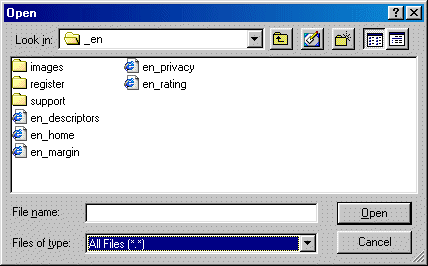
You should have a file called either index.htm or index.html. This is the file which is first to open when someone visits your site. Some programs may call it default.htm. Either way, that's the one to open. You will then see a load of HTML, similar to (but not the same as!) that shown below:
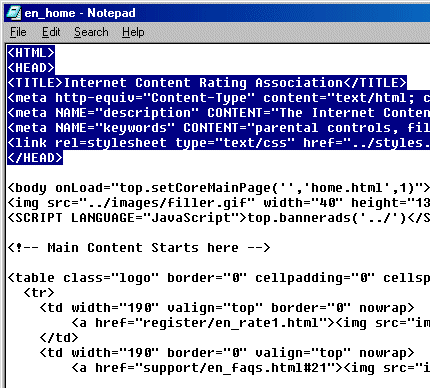
We've highlighted the important part. This is called the Head section. Notice it begins with <HEAD> and ends with </HEAD>. We need to make a bit of space for our ICRA label. In this example below, we clicked at the end of the line which contains the page's title and then pressed [Enter] to insert a new line.
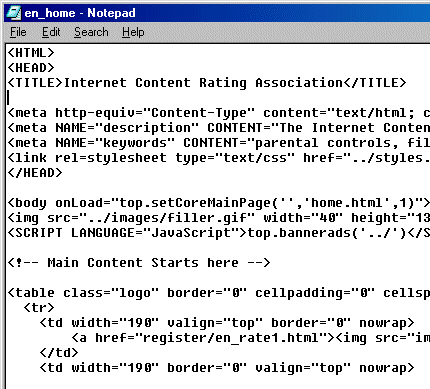
You can put this new line ANYWHERE in the HEAD section.
Leave this window open while going onto the next section.
Copy and paste the ICRA label
Now go back to the Notepad file you have open and click on the empty line. Press Ctrl+V (both keys together). This is the standard Windows operation which pastes whatever is in the Clipboard into wherever you have the cursor in the active Window).
You should see something like this:
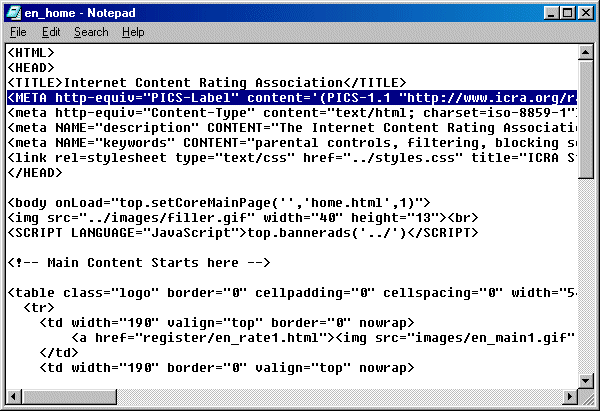
And that's all you have to do, however, most web authors who rate their site with us also then add the ICRA logo to their site. If you want to do this, read on. If not save and close the file and then upload to your site in the way you are used to.
Adding a "Labelled with ICRA" link
In a short while, you'll be opening a "pop up" window in which you'll see all the available buttons. When you've found the one that best suits your site, put the mouse over it and click the right button to bring up the small menu, see below:
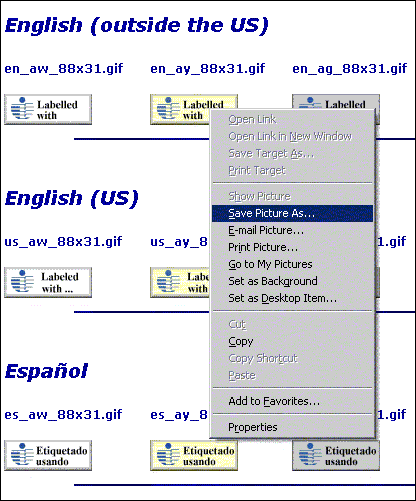
Select [Save Picture As] and then navigate your way to the folder in which you are keeping all the images for your site. Then click [Save]. You should now close the pop up window by clicking either the "X" in the top right hand corner or the "Close Window" link at the bottom of the page.
OK, now you know what to expect, click here to open the pop up.
Now that you have a copy of the button you want, it may be easier for you to use your regular software to add it to your site, but if you prefer to write the HTML for yourself, please skip back to the main FAQs page for sample code.
Please link this image to "https://icra.org/labelv02.html". This will give visitors to your site an introduction to the ICRA system and the label you have chosen.
Alternatively, you can just add just the words "Labelled with ICRA" (or Labeled with ICRA in the US!) to your site and link that back to us. Again, skip back to the main FAQs page for sample code of you want it.
That's it! When you're ready, you should now upload the site to the web and test...
Testing your label
If you haven't already done so, you should upgrade your browser to use the new ICRA system. Click here for details. If you have done so, you should enable Content Advisor and set it not to allow access to sites that have no rating and delete your Temporary Internet Files (please click here if you're unsure how to do this). Now go to your own site - you should have no trouble seeing your work!
If you do have trouble... then please make sure that:
- The label (HTML meta tag) is in the correct place
- The web design software you may be using has not "stripped out" the label you so carefully put in place (few actually do this, but it is not unknown)
- The label has not been corrupted (accidentally edited) in any way. Ideally, the whole label should appear on one line
- Check you have Content Advisor set up correctly!
Further support
There are as many ways of creating a web site as there are web sites! It is therefore simply not possible to provide a complete description which would cover any and all eventualities. This walk through is about as generic as we can make it. So, if you are left confused then we suggest you take the following action:
- Buy in some nice coffee and/or wine
- Perhaps add a few bowls of nuts, crispy snacks and dips, chocolates etc.
- Think about your friends and how nice it would be to see them again - especially the ones who are perhaps more confident on the computer than you
- Ask them over...